Showing posts with label Tutorials. Show all posts

Monday, March 25, 2013

Makyaj Dersi // Tutorial 8 - Everyday Bronze

Bu seriye Makyaj Dersi demek hic dogru degil aslinda. Ben ders verecek pozisyonda degilim ki. Ama eski blogumda da böyle yaziyordum, simdi de böyle devam ettim nedense. Belki ismine "Adim Adim Makyaj // Step By Step Make-Up" koysam daha dogru olur. Sizce? Fikirlerinizi alayim. :-)
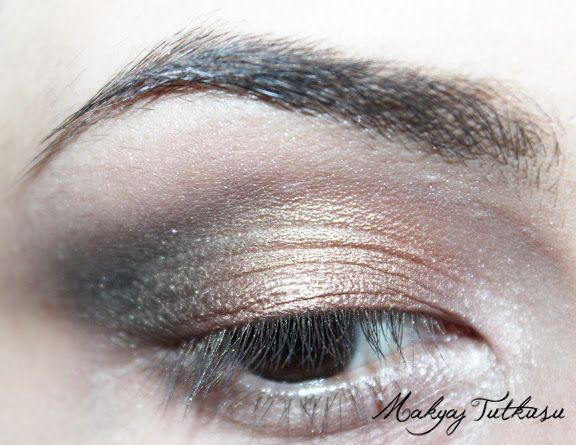
Gelelim bu yaziya. Birkac kisi mail ile iheartsu Blogger-Profilimde kullandigim profil resmindeki makyajin yapimini soruyordu, ben de bilgisayarimda aradim ve eskiden onun icin cektigim makyaj dersini buldum. Tabii eski blogun logosunu yeni blogunu logosuyla degistirdim ilk önce. Neyse, sonucum bu :-)

Calling this series 'Tutorial' isn't quite right actually. I'm in no position to give tutorials about make-up, but since I called this 'tutorial' on my old blog, I continued writing it like that here on my new blog, too. Maybe I will call it 'Step by Step Make-Up'. What do you think? Anyways, let's move on to the 'tutorial'. A few people have asked me how I did my make-up in my iheartsu Blogger-Profile's profile picture, so I searched for the tutorial pictures on my laptop and found them! Of course the logo of my old blog had to be replaced with my new blog's logo, so I did that and here we have it! I hope you enjoy this :-)


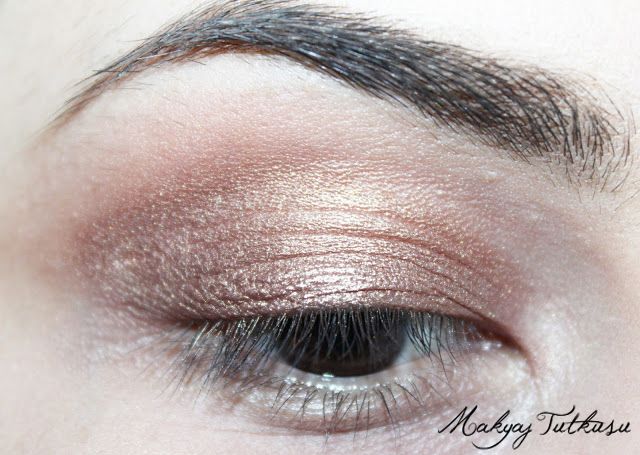
Buna 'Everyday Bronz' (= Günlük Bronz) ismini verdim, cünkü her gün icin uygun, basit bir makyaj, ama sonuc gercekten cok hos. Benim de cogunlukla yaptigim makyajlardan. Buyrun adim adim anlatima. :-)

I named this 'Everyday Bronze', because I think it's really simple and easy, yet very beautiful and perfect for everyday. I do this kind of look very often as well. Let's see how I did this step-by-step!

---

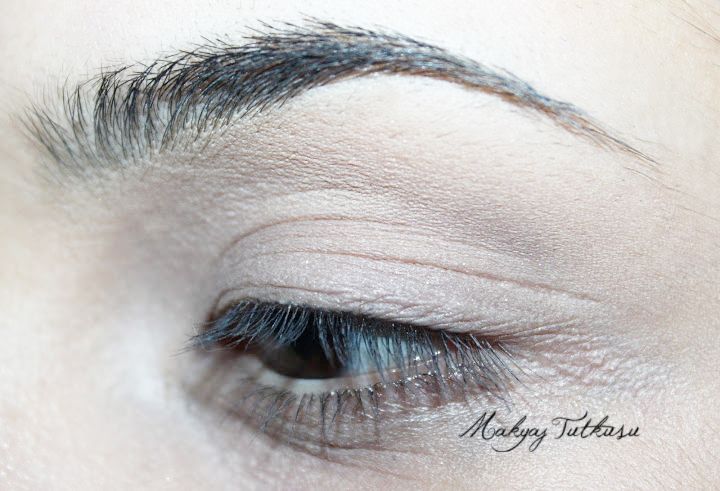
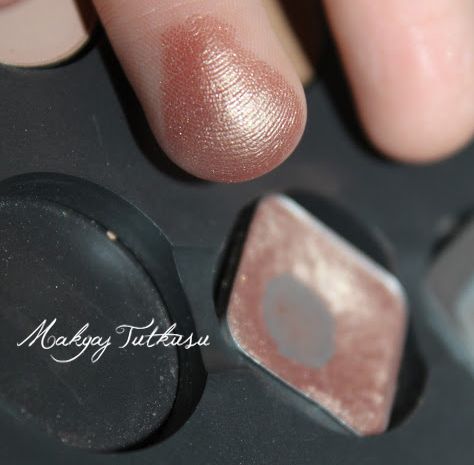
Step 1: Gözünüze baz sürdükten sonra altin/bronz bir fari bütün göz kapaginiza uygulayin. (Kaslarimi doldurdum bile.) Benim kullandigim renk MAC'in Devoted Poppy isimli paletindendi (ismini dogru mu söyledim, bilmiyorum).
After prepping your eyes with and eyeshadow base, apply a golden/bronze color to your entire eyelid. I used a color from a MAC Palette called Devoted Poppy or something like that.
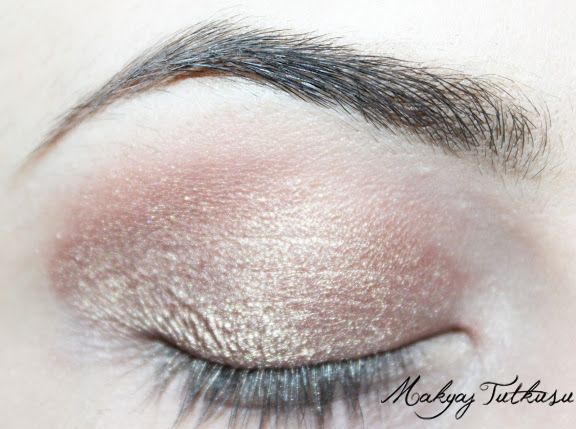
Step 2: Simdi yumusak ve temiz bir fircayla keskin cizgilerini yumusatin ve yedirin.
Now take a fluffy clean brush and blend out the harsh lines.

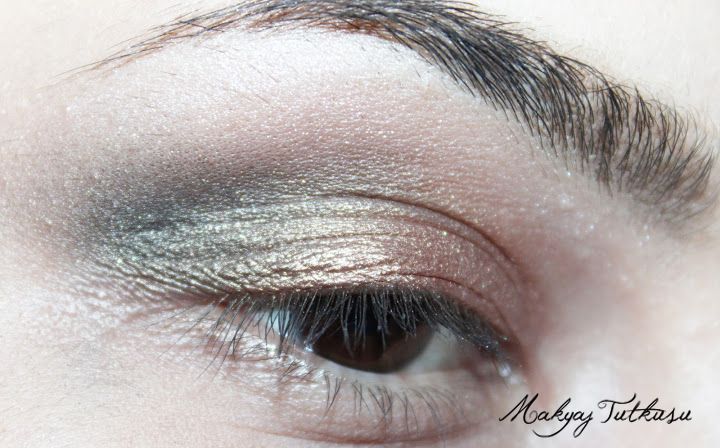
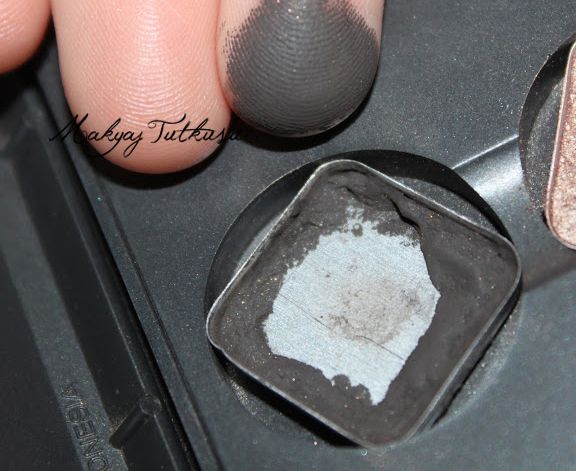
Step 3: Simdi hafif gri ve siyah ortasi bir mat renk sectim. Bu da ayni MAC paletindendi, ama farin ismini bilmiyorum. Bu hafif uygulandiginda ve bronz farla karistirildiginda biraz zeytin yesili bir renk aliyor ve bu cok hosuma gidiyor. Asagida ne demek istedigimi görebilirsiniz. Bunu kirisik bölgenize uygulayin.
Now take a grey-ish black matte color (this is also from the MAC palette, but I don't remember the name) and apply this into your crease area. When it's mixed with the bronze color, this eyeshadow turns into a beautiful olive color on the lids which I love.
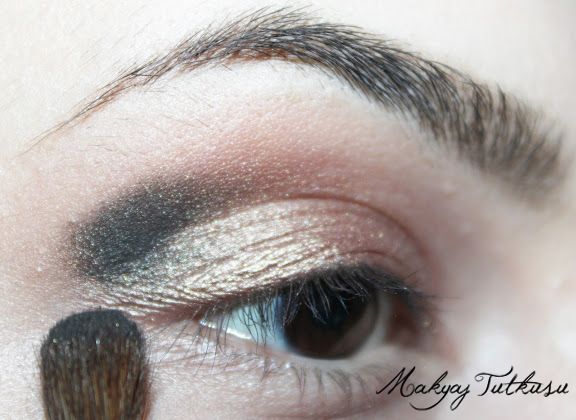
Ve karistirin tabii ki. Ben biraz daha enine dogru cektim, cünkü bu uygulamanin göz seklime cok yakistigini düsünüyorum.
And of course blend away. I blended it outwards, because I think it compliments my eyeshape more.
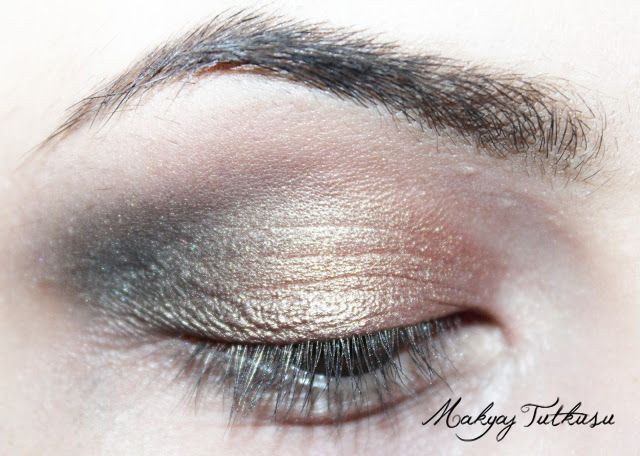

Step 4: Parlak beyaz bir far ile kasimin altini ve göz pinarimi aydinlattim.
With a pearly white shadow I highlighted my browbone and the inner corners of my eyes.
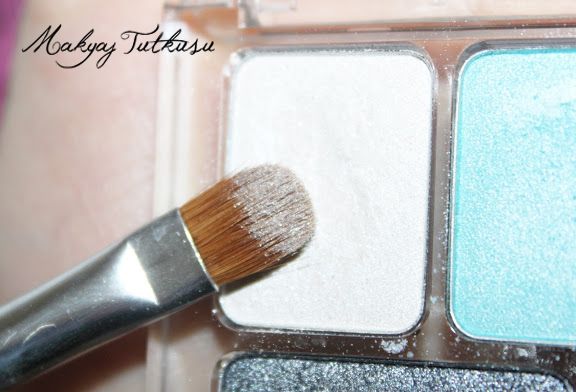

Step 5: Simdi gri fari göz altima (3de 1ine) uyguladim ve bronz fari göz altimin ortasina (bos kalan yere) uygulayip birbiriyle karistirdim.
Now I took the grey eyeshadow and applied it on my lower lashline (outer third) and took the bronze color and applied it on the middle part of my lower lashline.
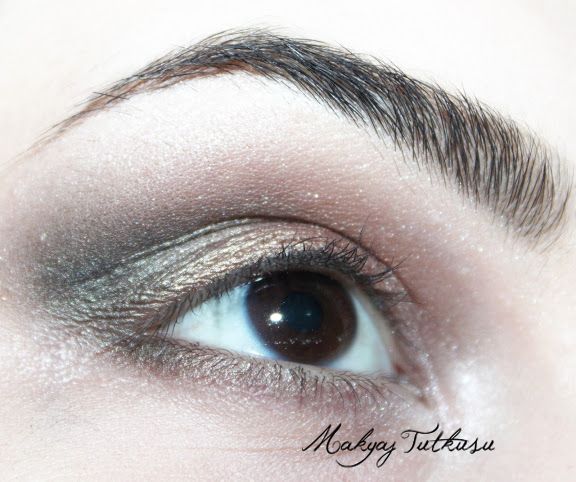

Step 6: Likit eyeliner ile gözlerime bir eyeliner cektim ve hafif bir kuyruk cizdim. (Maybelline Liner Express)
Now with a liquid liner I lined my eyes and winged it out slightly.
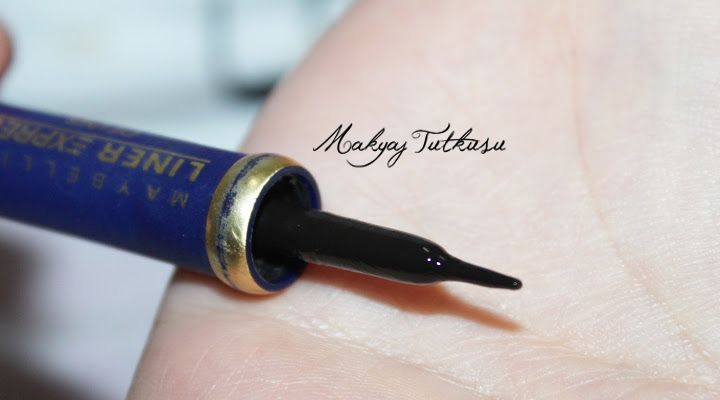
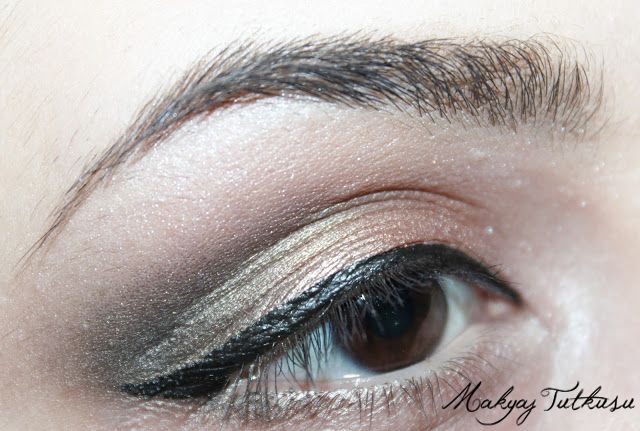
Bir ara bu eyelinersiz yasayamam derdim, ama simdi bu resimlere baktikca pek de iyi olmadigini düsünüyorum. Eyelinerin kuyrugu pek sivri ve temiz degil ve bitisi parlak. Yok, ben Catrice Liner'imde kalayim.

I used to think that I can't live without this eyeliner, but now that I'm looking at these pictures, I don't think it was that good. The wing isn't precise and clean and the finish isn't matte. No thanks, I'll stick to my Catrice Liner.


Step 7: Simdi siyah bir göz kalemiyle gözlerimin icine bir cizgi cekiyorum (sadece ortasina kadar) ve ardindan ince bir fircayla asagi dogru (farlarin oldugu yere kadar) yediriyorum. Bana göre yedirmeyince biraz keskin duruyor, ve ben keskin göz kalemini sevmem, hep asagiya dogru yediririm.
Now I applied a black khol liner on my waterline (up to the middle of my eye) and then I took a thin brush and blended the khol liner down into the shadows on my lower lashline. I think that if I don't blend it out, the line looks too harsh and I'm not a fan of that look, so I always blend it down.
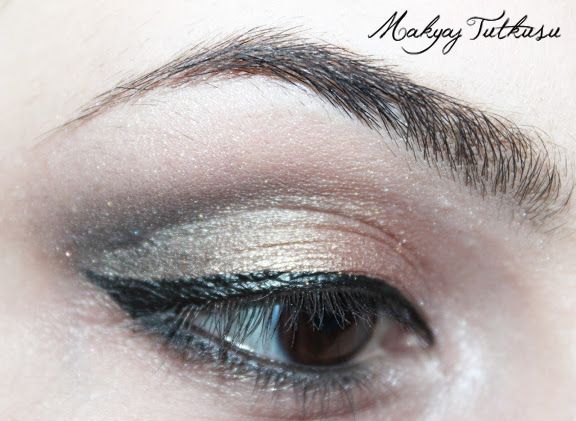

Step 8: Rimel zamani! Üst ve alt kirpiklerimde kullandim. Daha 'dramatic' bakislar isteyen sahte kirpik de takabilir, ama günlük makyaj oldugunu düsünürsek cogumuzun tercihi degil.
Mascara time! Top and bottom lashes please. If you want you can add false lashes, but since it's an everyday look, most of us don't prefer them.
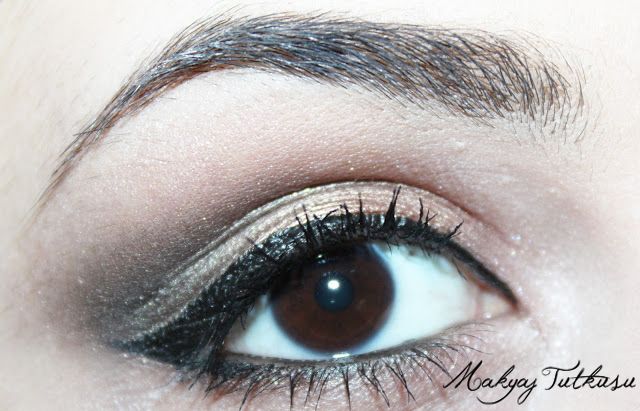

Gözlerle isimiz bitti, sonuc böyle...
We're finished with the eyes and here's what the make-up looks like...
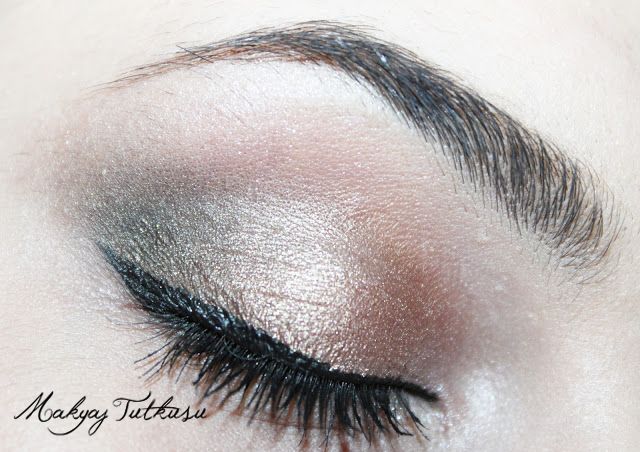

Step 9: Yüzüme kontur ve sicaklik getirmesi icin Benefit'in Hoola bronzerini yanak kemiklerimin altinda ve sakaklarimda kullandim.
To contour and give my face some warmth, I applied Benefit's Hoola bronzer under my cheekbones and on my temples.
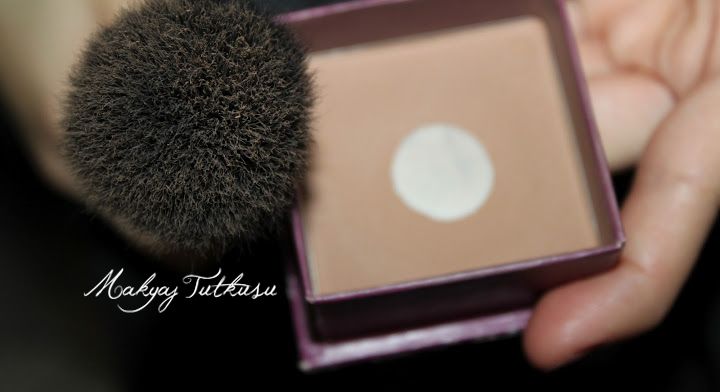

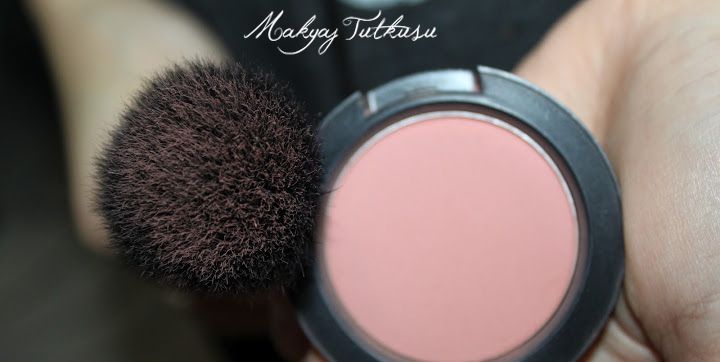
Step 10: Yanaklara pembelik ve ferahlik getirmesi icin de MAC'in Melba alligini kullandim.
For rosy and flushed cheeks I used MAC's blush in Melba.

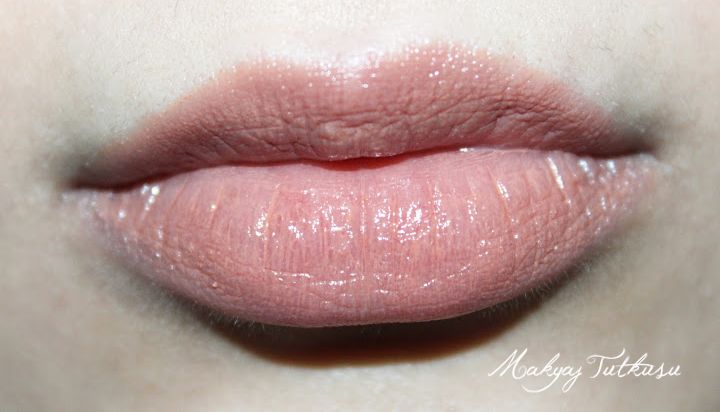
Step 11: Son olarak da önceden lip balm ile nemlendirdigim dudaklarima nude/pembe karisimi bir ruj sürdüm (MAC Freckletone)
To finish off, I used MAC's Freckletone, which is a pink-ish nude, on my 'lipbalmed' lips.
Ve Blogger profil resmimdeki makyaji böyle yaptim! Cok basit. Ne kullandik ki? 3 far, eyeliner, rimel, göz kalemi, bronzer, allik, ruj. Tamam, cok kullanmisiz. Ama olsun be, bosuna mi aliyoruz onca makyaji, kullanacagiz tabii!

And this is how I did my make-up on my Blogger profile picture. It's really simple and easy, right? :-)

Son zamanlarda bu makyajin aynisini yapiyorum hep, ama bir farkla: göz altima hicbir sey kullanmiyorum. Ne rimel, ne göz kalemi (nude kalem haric), ne de far. adece göz pinarlarima aydinlatici sürüyorum, o kadar. Göz altimi bos biraktigim zamanlar gözlerimin daha büyük göründügünü düsünüyorum. Diger türlüsü zaten kücük olan gözlerimi daha da kücük gösteriyor da. Umarim begenmissinizdir, hepinizi öpüyorum!

I noticed that I've been doing this look a lot lately, except for one thing: I don't use anything on my lower lashline: no mascara, no eyeliner (nude liner is an exception), no eyeshadows... Because when I apply dark products on my lower lashes/lashline it makes my already small eyes even smaller. Anyways, I hope you enjoyed this!

- iheartsu
Instagram: iheartsu
Mail: theheartscalling@gmail.com

----------
Next Post: Maybelline Color Tattoo 'Permanent Taupe'


Monday, March 11, 2013

Tüyo: MAC Farlari Nasil Depot Edilir? // Tip: How To Depot MAC Eyeshadows

Merhaba arkadaslar! Bu yazimda size MAC (veya MAC'e benzer ambalaja sahip olan) farlari nasil depot, yani kutusundan cikarip palete yerlestirebileceginizi gösterecegim. Bu yaziyi eski blogumda da paylasmistim ve bircok kisinin isine yaradi, bu yüzden bu sefer de paylasmak istedim. Yalniz resimlerde eski blogumun linkini (passionistaa.blogspot.com) silip üzerine simdi ki blogun ismini yazdim, o yüzden biraz tuhaf durabilir. Yani baskasindan caldi diye düsünmeyin, ben cektim resimleri :D Her neyse, zaten cok resimli bir yazi, bir de dirdirimla sizi cok bunaltmak istemiyorum. Buyrun efendim!

Hello everyone! In this post I want to show you how to depot your MAC (or similar to MAC packaging) eyeshadow. I posted this on my old blog, so it still had my old blog's link on it (passionistaa.blogspot.com), which is why I had to cover it and write this blog's name on top, so that's why it looks a little weird. sorry for that. Don't think I stole it from someone, it's all mine^^ Anyways, this is a pic heavy post and I don't want to talk too much and make it boring for you, so here you go!

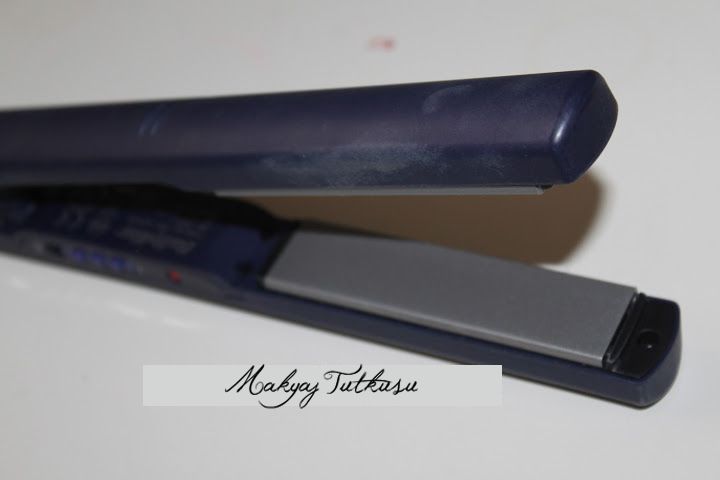
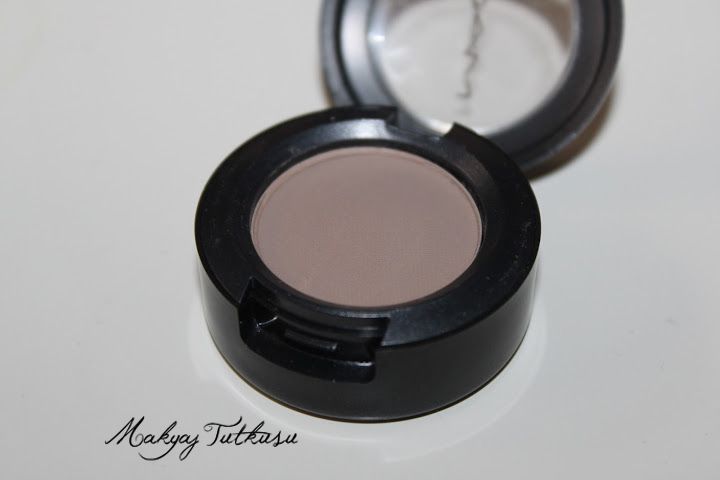
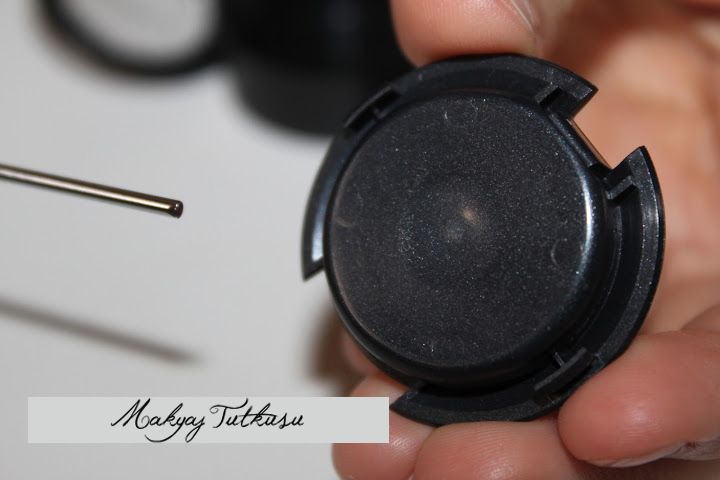
Lazim olan seyler bunlar: Depot yapilacak MAC fari, sac düzlestiricisi, cimbiz, sivri uclu igneye benzer bir sey (bicak da olabilir), manyetik ped ve manyetik bir palet.

Here's what you'll need: MAC eyeshadow, a flat iron, tweezers, a little thin and pointy ... something (a knife will do the job, too), round magnets, magnetic palette to hold your e/s.


Sac düzlestiricinizi acin.
Turn on your flat iron.


Farinizi hazir tutun!
Get your e/s ready!


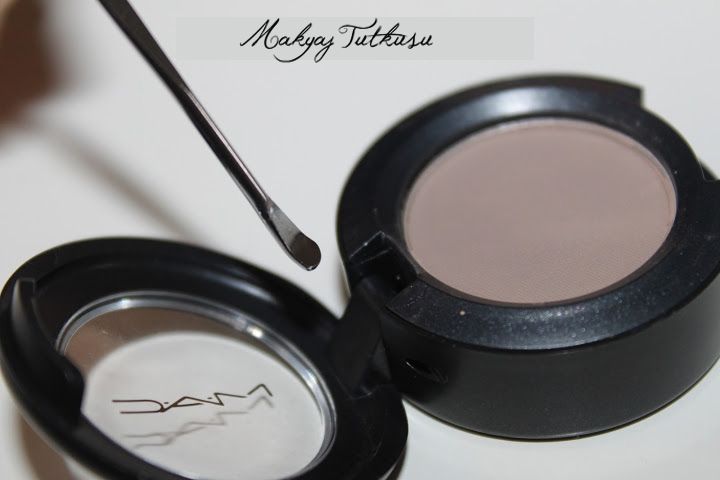
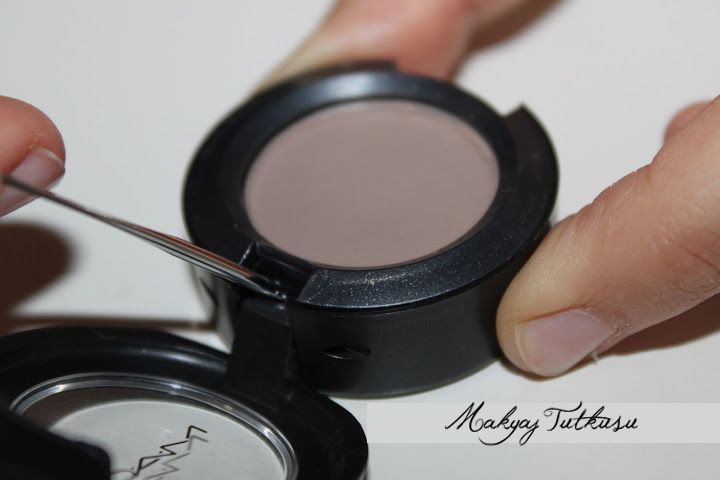
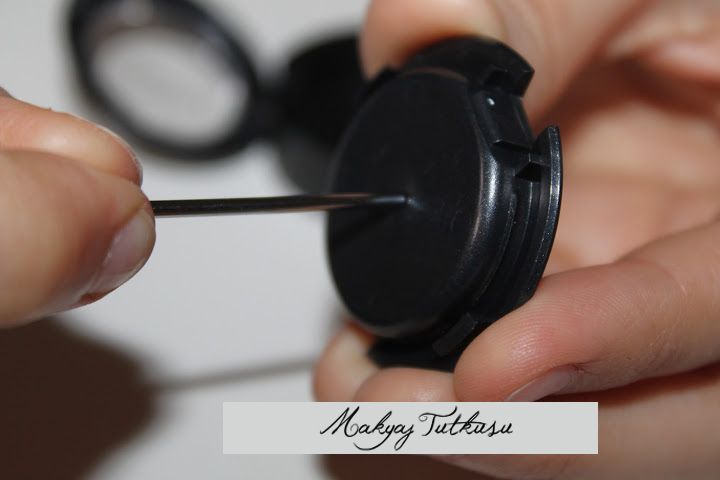
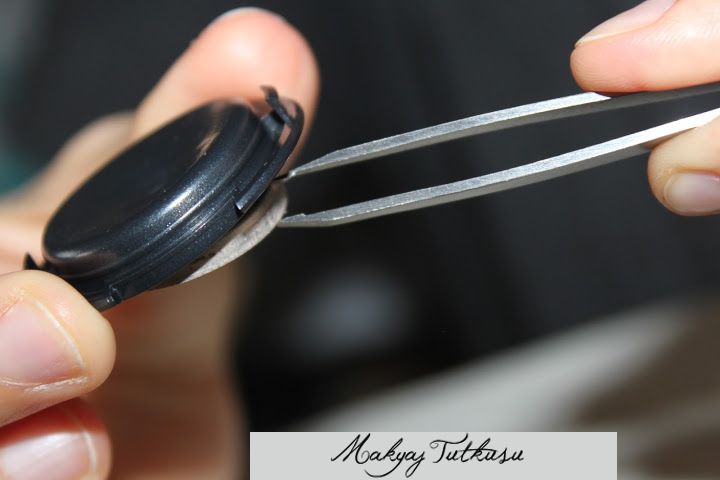
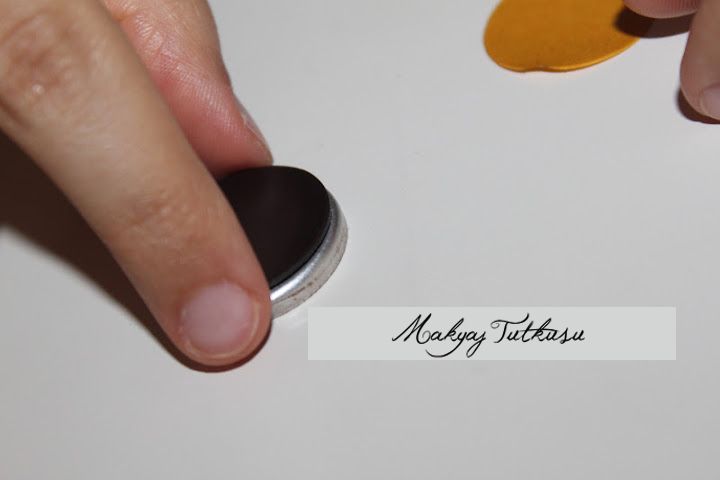
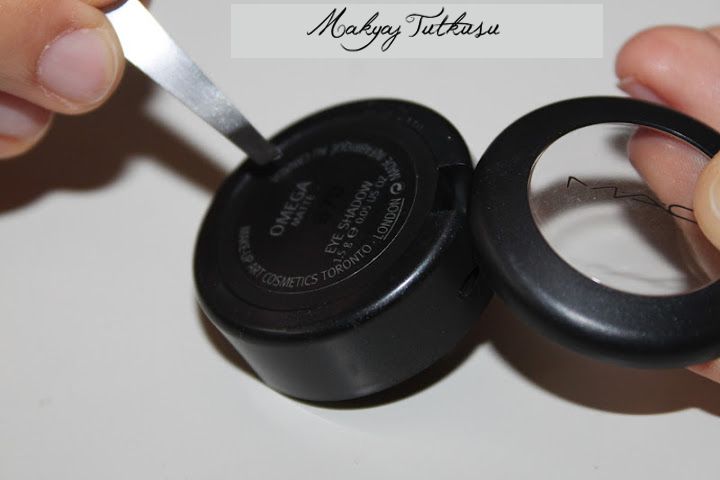
Ince igne gibi seyle farin arka tarafindaki bosluga girin ve biraz baski uygulayin. Yeterince bastirdiysaniz, o zaman far kendiliginden disari firlayacaktir.

Now, go in with the little needle thingy and put it into the little hole in the back of the eyeshadow pot, then push a little. If you push hard enough, the eyeshadow will pop out.

Iste böyle...
Like this...


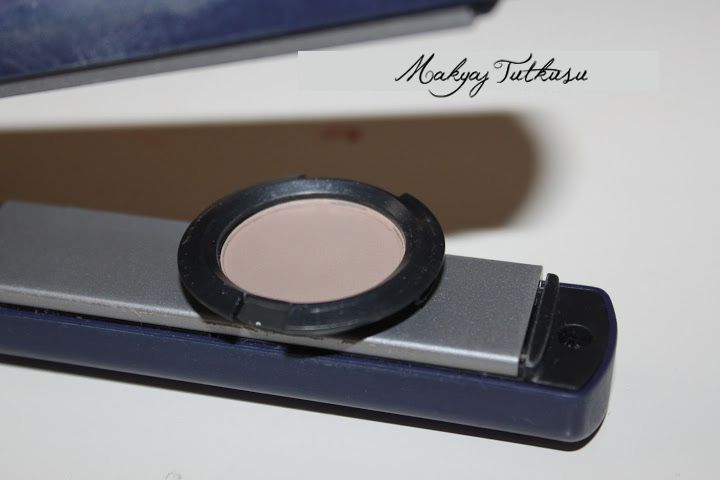
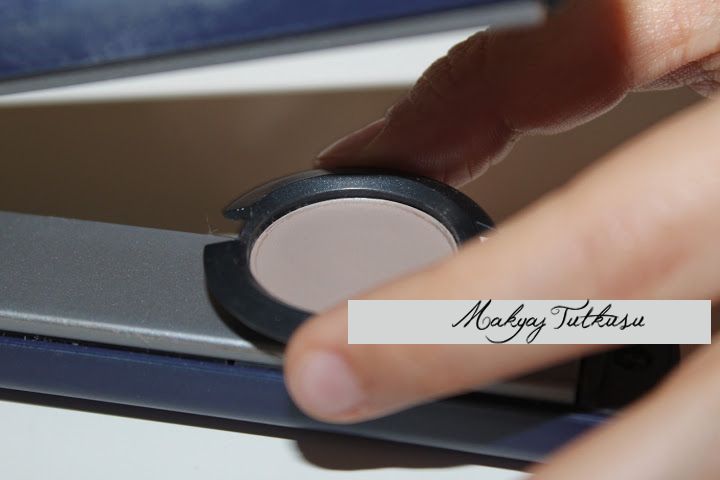
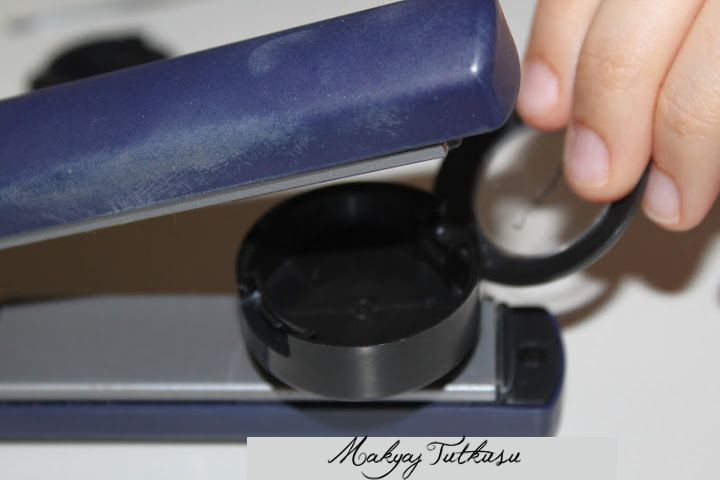
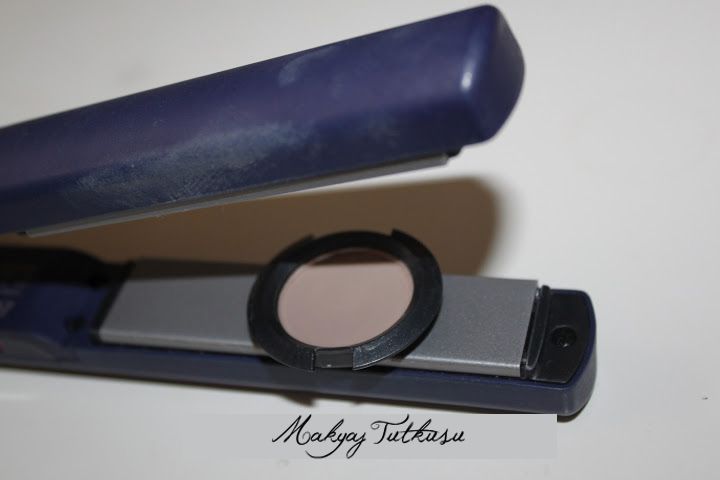
Simdi disari firlayan fari alip isinmi düzlestiricinizin arasina koyun resimde oldugu gibi. Elinizi yakmamaya dikkat edin. Eger yakarim diye korkuyorsaniz, o zaman düzlestirici ve farin arasina firin kagidi koyun.

Now put your eyeshadow in between your flat iron, but be careful not to burn your finger. If you want to be extra safe, put some baking sheet between the flat iron and the eyeshadow.


Farinizin alti plastikten yapildigi icin cabucak eriyebilir; bunu engellemek icin hafifce oradan oraya oynatin, yapisip kalmasin.

Because the black part is made of plastic, it can easily melt; so to prevent that, you have to keep moving the eyeshadow so it doesn't stick.


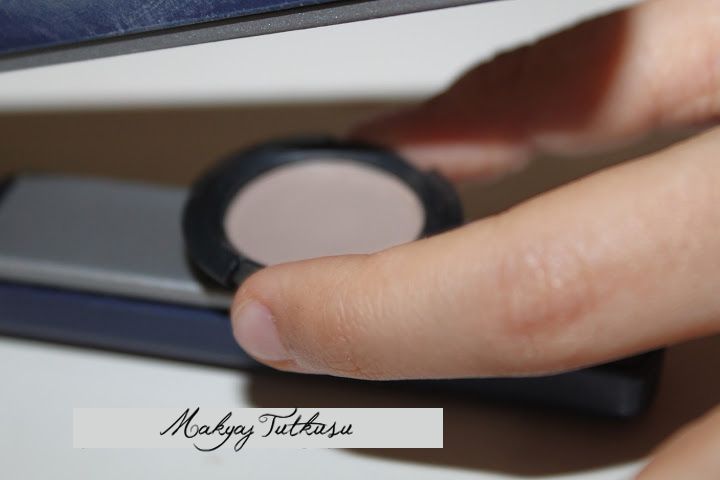
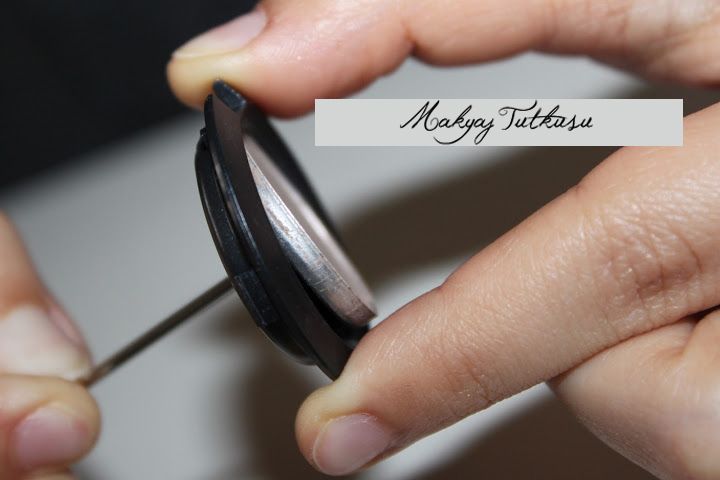
Yaklasik bir dakika sonra fari elinize alip o ince igne gibi seyle plastigin arkasindaki ortadaki noktaya bastirin. Biraz yumusamiz olmasi lazim. Bastirinca iyice icine girip far disari cikiyorsa, o zaman iyi, ama eger cikmiyorsa, o zaman tekrar dönüp biraz daha düzlestiricinin üstüne koyun. Benimkisi henüz hazir degildi, bu yüzden geri koydum düzlestiricinin arasina.

About a minute later remove it from the flat iron and try to push the little needle-like thing into the middle of the plastic back. It should be warm enough to push and for the pan to come out, but if it doesn't, then put it back in between the iron to warm it up a little more. Mine wasn't ready yet, so I put it back in the flat iron.


Simdi ayni seyi tekrar deneyin. Bu sefer bende oldu ve kolaylikla cikti disari gördügünüz gibi.

Now try the whole thing again. This time it worked for me and it came out effortlessly.


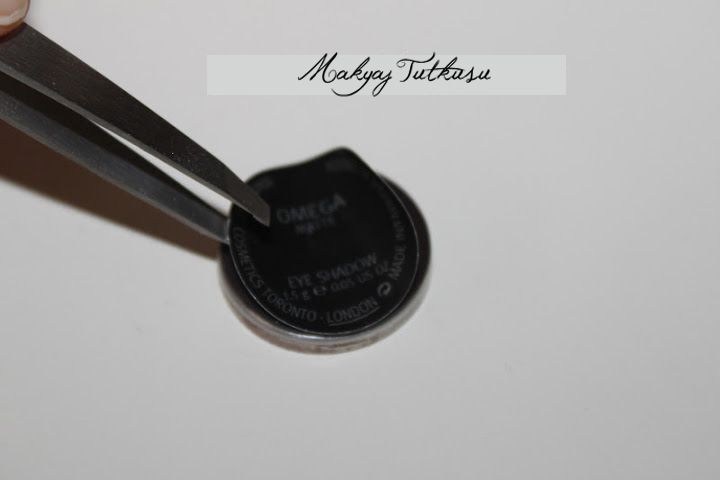
Bir cimbizla dikkatlice tutup cikarin. Bir kriminal olup da parmak izinizi yok etmek istemediginiz sürece elinizle dokunmayin :D

Take it out with a pair of tweezers. If you're not a criminal who wants to erase his fingerprints, then I don't suggest you to touch it with your fingers.
:D


Yapiskani hala sicak oldugu icin yüz üstü koyun masaya.

Because the glue is still hot, put it face-down on a surface.


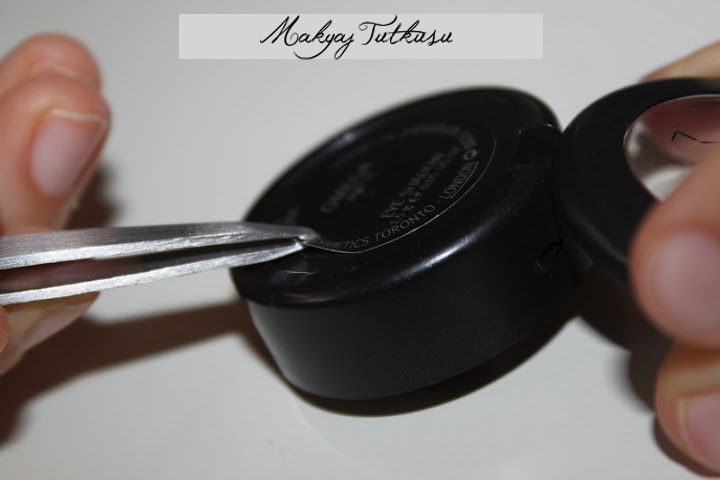
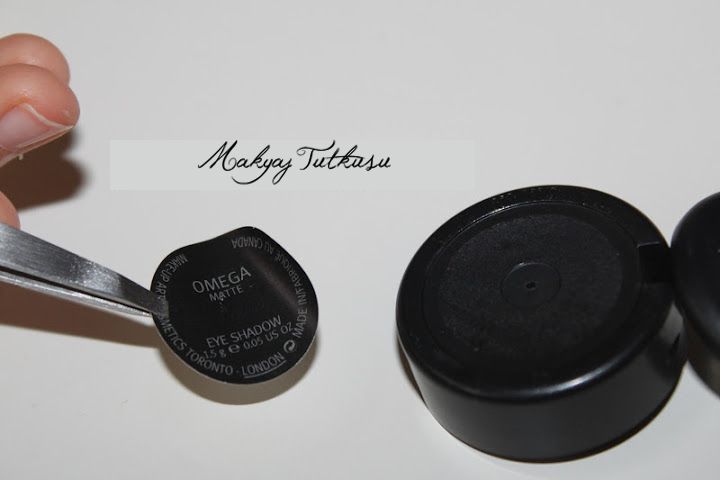
Yapiskanin sogumasini beklerken diger islere gecelim. Far kabinin arkasindaki yuvarlak yazili yapiskani farimin arkasina yapistirmak istedigim icin onu da düzlestiricinin arasina koydum ve yapiskaninin isinmasini bekledikten sonra stickeri ayirdim.

While we're waiting for the glue to cool off let's do some other things, like taking off the sticker at the back of the pot! Just put it under your flat iron and wait for its glue to become warm.


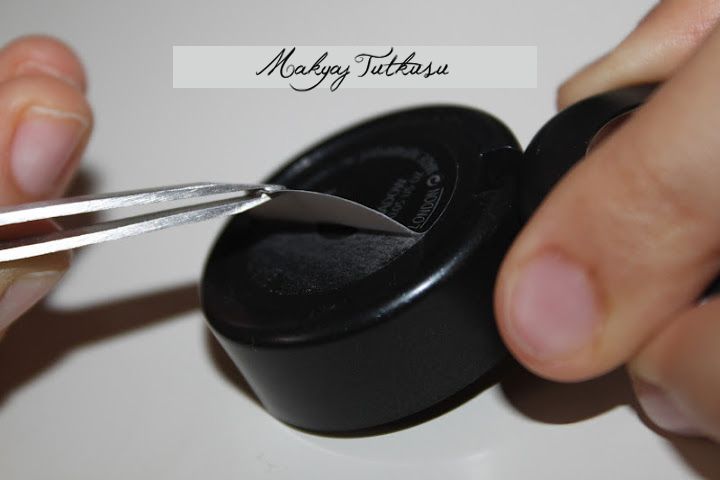
Cimbizla ayirin.
Take it off with tweezers.


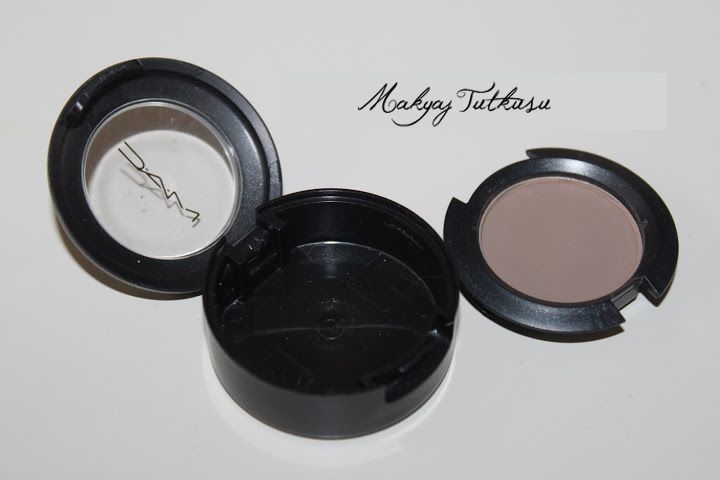
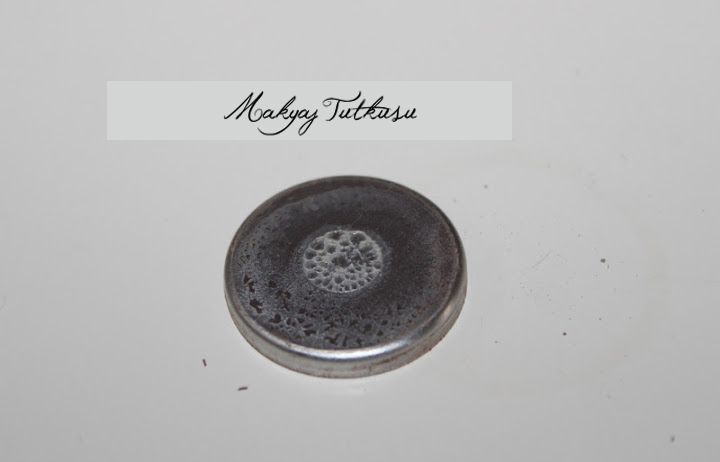
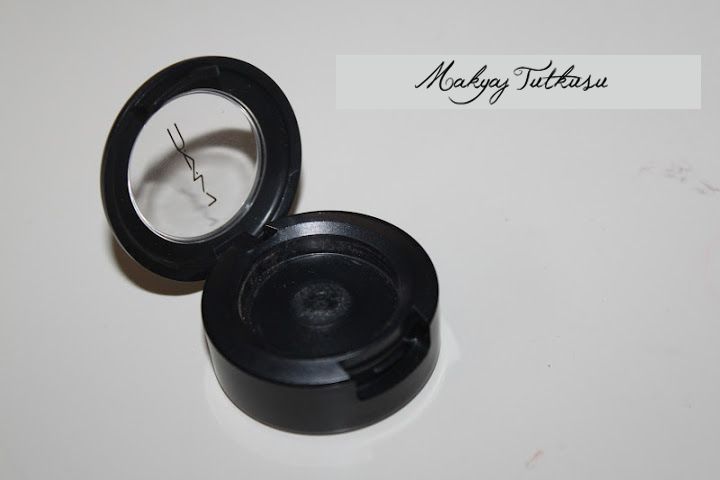
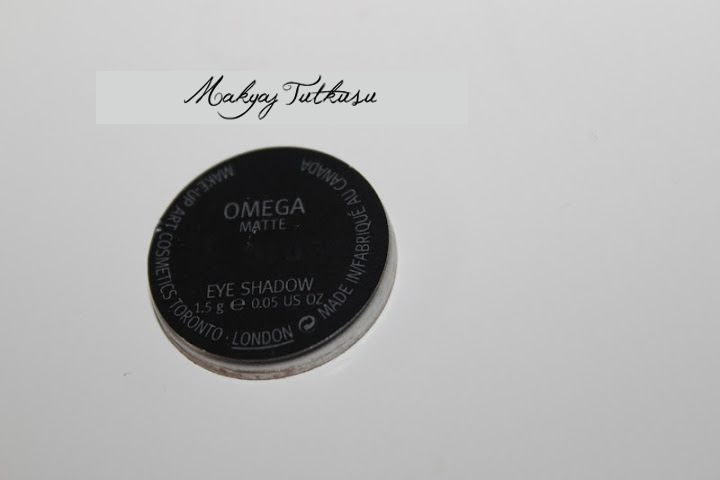
Simdi bu kutu kaldi elinizde. Bunu Back 2 MAC yapabilirsiniz ve 6 tane kutu verdiginizde karsilik olarak bir ruj verirler size. Türkiye'de yapiliyor mu bilmiyorum ama. =/ Bir de bazi MAC elemanlari icinde o metal pot olmayan kaplari almiyorlar. Dikkat edin yani, bazilari giciklik yapabiliyor.

Now you have this empty pot left. You can collect 6 empty MAC containers and return it for a MAC lippie via Back 2 MAC, but some MUAs don't accept pots without the pans, so be careful who you ask.


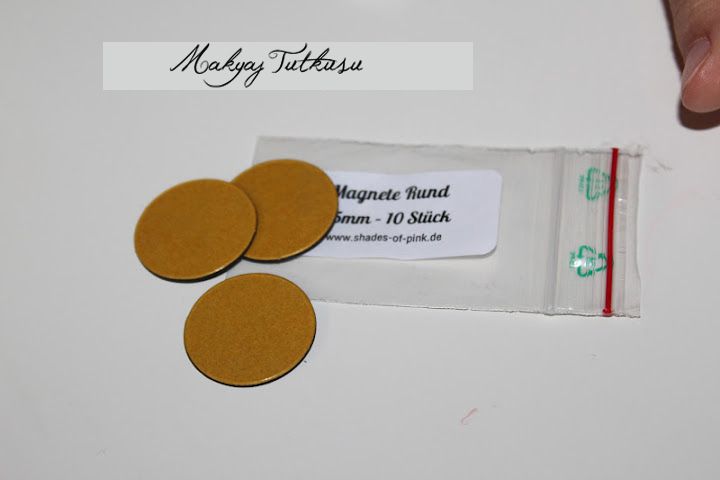
Simdi yuvarlak yapiskan miknatislari alip sogumus olan farinizin arkasina yapistirin.

Now take your round adhesive magnet and place it on the back of the (now cool) pan.


Ardindan üzerine biraz önce cikardigimiz yazili yapiskani bastirin.

Now take the label sticker and stick it on top of the magnet.


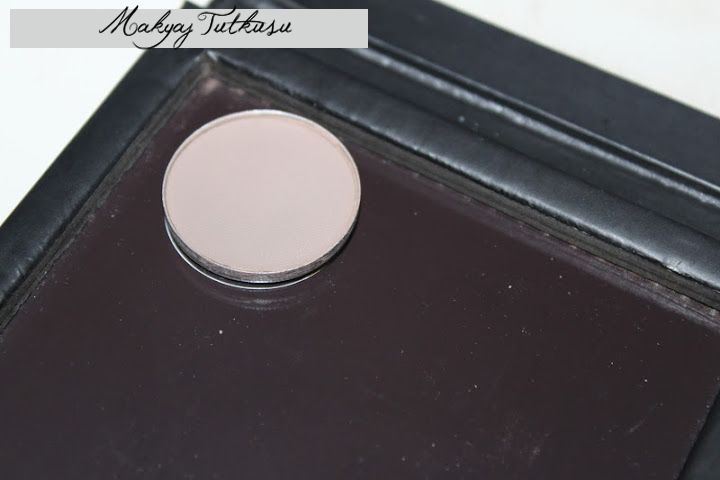
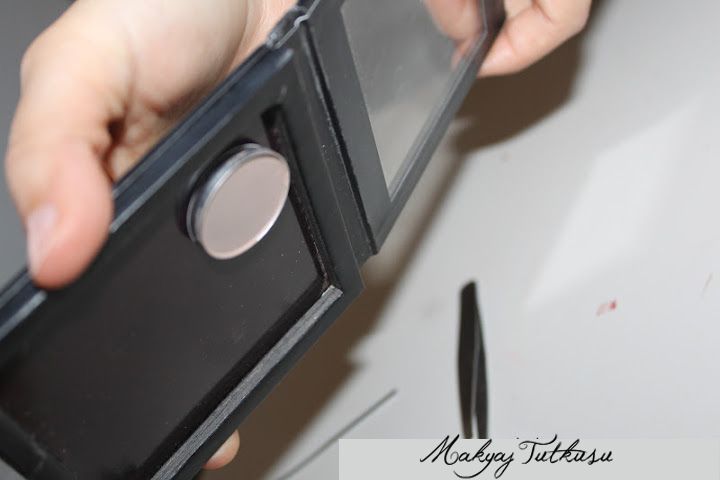
Tadaaah! Bu kadar basit! Simdi de herhangi bir manyetik palete yerlestirin. MAC 15'li paletlere koyuyordum eskiden, ama Z-Paletlerin daha pratik oldugunu düsünüyorum simdi. Ayrca asagidaki resimde gördügünüz gibi hic disari da düsmüyor farlariniz. :-)

And now it's done! It's really simple, right? All you have to do now is put it in a magnetic palette, like the original MAC 15 palette or a Z-Palette like me. I personally prefer the Z-Palettes because they're smaller and fit more shadows, but it's totally up to you.

Umarim bu yaziyla size yardimci olabilmisimdir. Bir sonraki yazimda görüsmek üzere!

I hope this little tutorial was helpful to you. I'll see you in my next post!

- iheartsu
----------

Sunday, March 10, 2013

Makyaj Dersi // Tutorial 6 - Pop of Color

Merhabalar! Bugün sizlerle bir makyaj dersi paylasmak istiyorum. Kahverengi gözler icin bir dumanli makyaj yapmam istenmisti. Onun icin de ayri bir ders yaparim, ama bu ders de kahverengi gözler icin uygun bence, cünkü yesil farla oynuyoruz ve yesil her zaman kahverengi gözlere yakistirmisimdir. :-)
Bu dersi paylasip paylasmamak arasinda kararsiz kaldim ilk basta, cünkü resimler makyaji pek iyi göstermedi. Aynaya bakinca iyiydi, ama resimlerde renkler biraz komik cikmis gibime geldi sanki. Bilmem, görün bakin, siz ne düsünüyorsunuz?
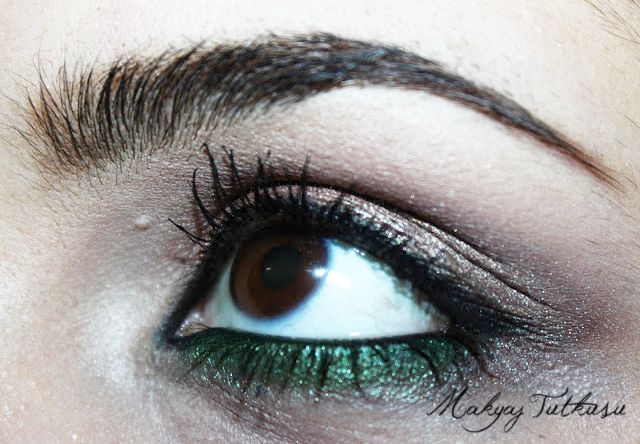
Sonucumuz bu...

Hi everyone! Today I want to share a tutorial with you. Someone requested me to do a smokey eye for brown eyes. I'll do another tutorial on that, but I think this look is also really great for brown eyes, because we're playing with some green as a pop of color on the lower lashline. I've always liked the look of green eyeshadow on brown eyes. At first I wasn't sure whether to post this or not, because I think the make-up doesn't look so nice on the pictures. It looked better in my mirror, but in the pics it's kind of different. Let me know what you think. This is my result...


Step 1: Kaslarimi ve kapaticimi henüz yapmadim. Göz kapaginiza farin birikmesini engelleyecek bir baz kullanin. Ben MAC'in Soft Ochre Paint Pot'unu kullandim.
I haven't filled in my brows and haven't used a concealer yet. Use an eyeshadow base to prevent your eyeshadows from creasing. I used MAC's Soft Ochre Paint Pot.


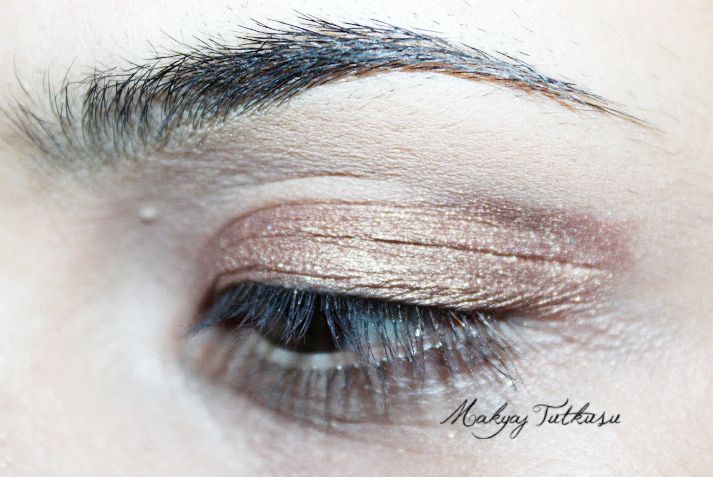
Step 2: Altin/bronz karisimi bir rengi bütün göz kapaginiza uygulayin. Henüz karistirmaniza gerek yok.
Apply a golden bronzy color on your entire lid, but don't blend out yet.


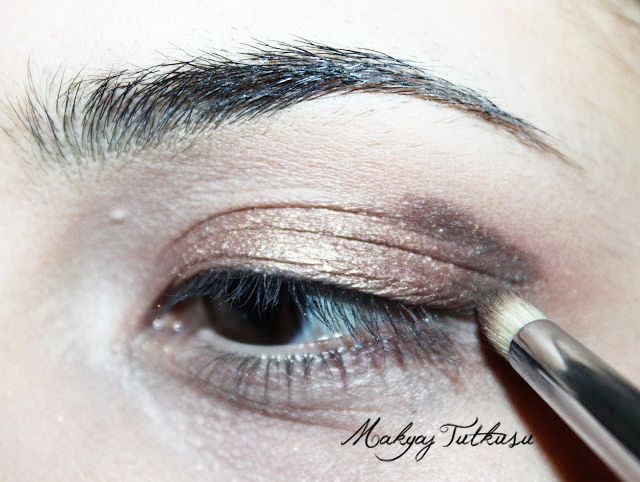
Step 3: Simdi kahverengi bir far ve ince bir fircayla göz kapaginizin dis tarafina yan yatan bir V cizin. Ardindan iki rengi de yumusak bir fircayla birbirine karistirin.
Now take a brown eyeshadow and apply this on your outer corner in a V shape. After that, take a blending brush and blend the two colors together.


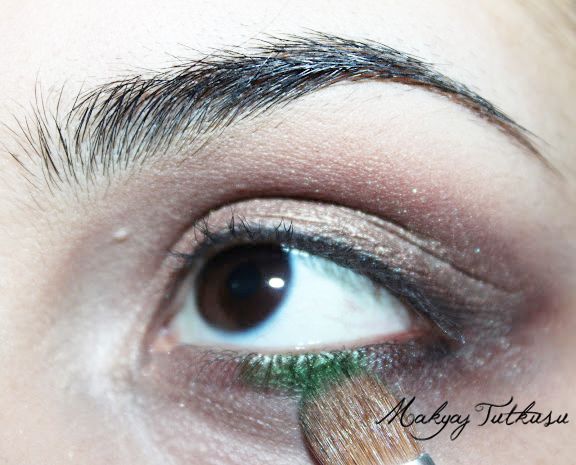
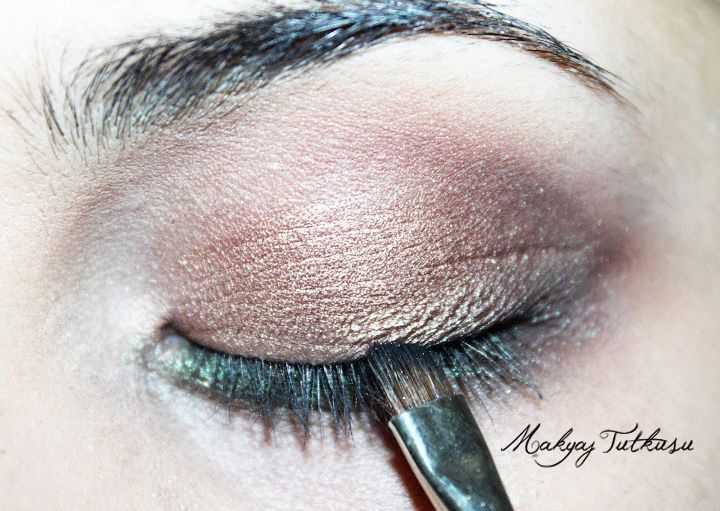
Step 4: Simdi 'zehir' yesili bir far alip, bunu gözünüzün altina uygulayin ve dumanli bir sekilde kayboluyormus gibi görünmesi icin karistirin. Lazimsa yesil bir krem far uygulayin, ardindan fari üzerine bastirin, ama benim farimin pigmentasyonu iyi oldugu icin gerek duymadim.
Now take a bright green color and apply this on your lower lashline, then blend it out. If you want, you can use a cream base for this, but my eyeshadow was already very pigmented, so I didn't need one.


Step 5: Siyah bir far ve ince bir fircayla göz kapaginizin üzerine bir cizgi cekin. Bu bir eyeliner degil, sadece kirpikleri daha dolgun göstermek icin bir yöntem, yani bir kuyruk cizmeyin.
Now take a black eyeshadow and an angled thin brush and apply this on your upper lashline. This is not an eyeliner; it's just a way to make your lashes look fuller, so don't draw a wing.


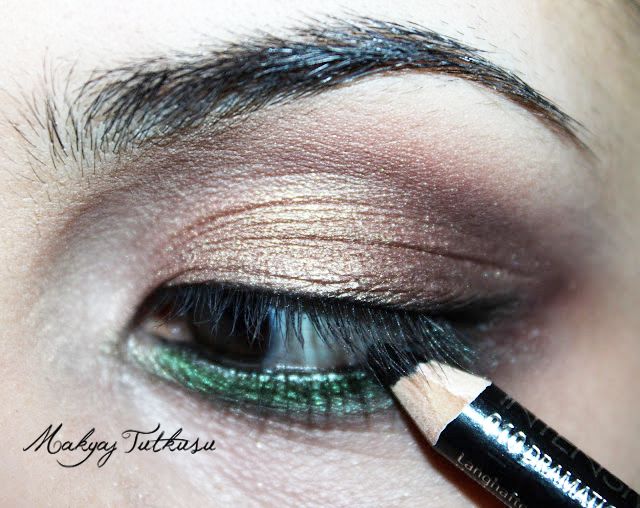
Step 6: Siyah bir kalemle gözünüzün icine bir cizgi cekin, ayni seyi tightline olarak da yapin.
Take a black eyeliner pencil and apply this on your waterline and also tightline.


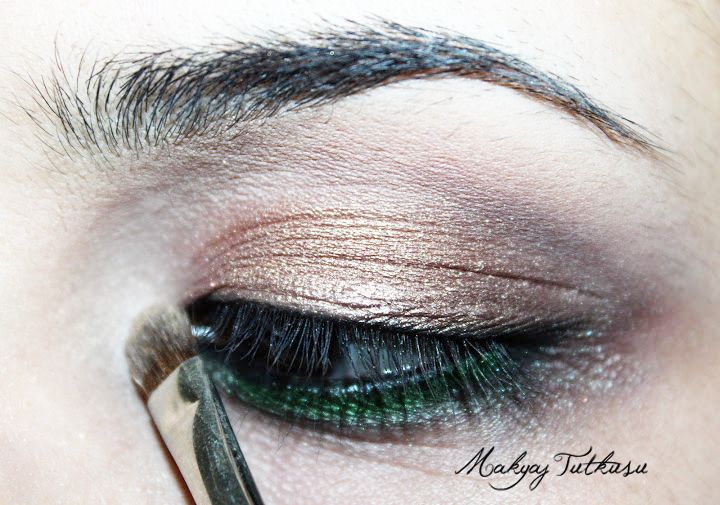
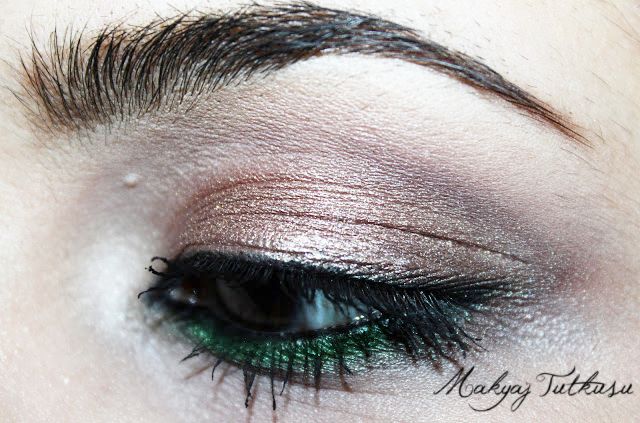
Step 7: Göz kapagimdaki far bana biraz fazla geldi, bu yüzden yumusak bir firca ve yüzümde kullandigim pudrayla kirisik bölgemdeki fari biraz 'azalttim', yani rengini biraz daha soluk gösterdim.
If you think your eyeshadow is a little too much like me, then go in with a blending brush and your face powder and just apply it in your crease to make the eyeshadow look a little softer.


Step 8: Simdi parlak bir farla hem göz pinarinizi, hem de kasinizin altini aydinlatin.
Now apply a pearly eyeshadow in your inner corners as well as under your browbone.


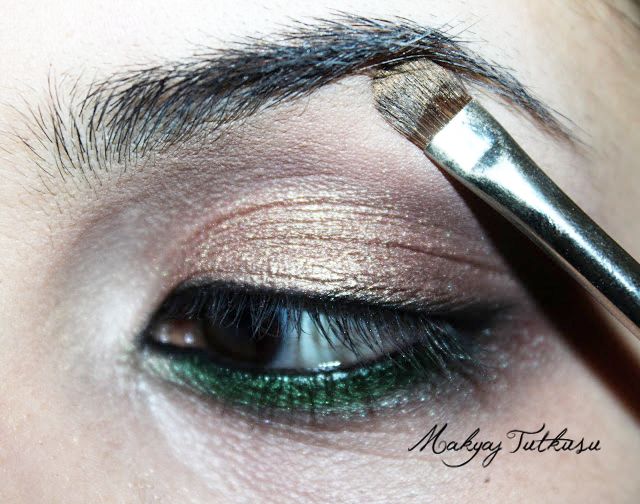
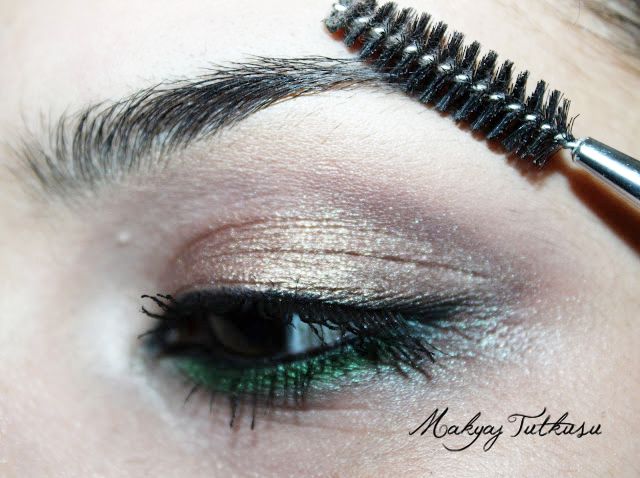
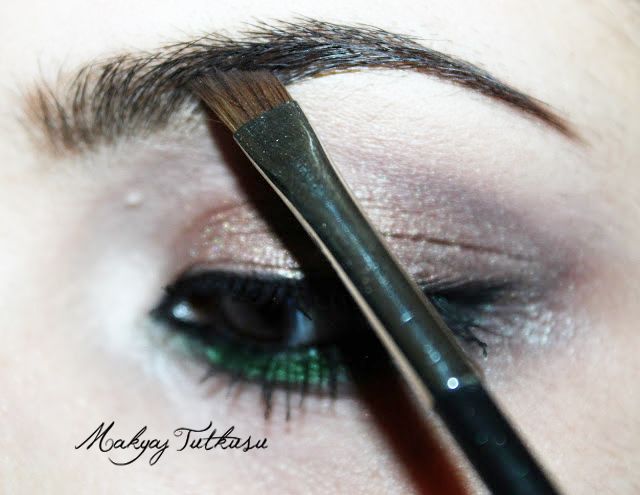
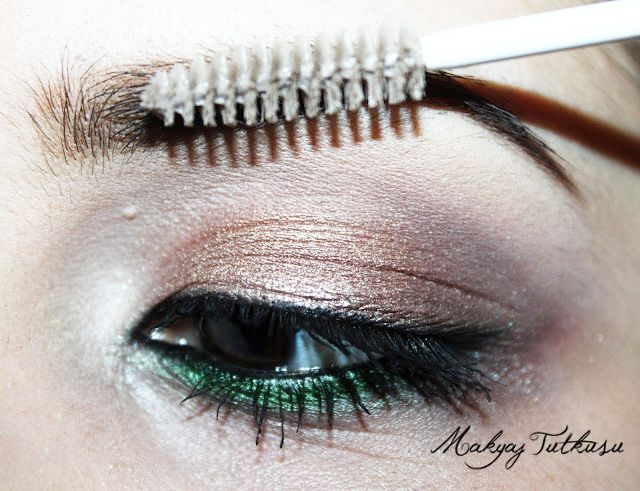
Step 9: Kas rutininizi yapin. Ben önce kaslarimi taradim, sonra doldurdum, ve ardindan kas jeliyle sabitledim.
Now do your brow routine. I brushed them through, filled them in and set it with a brow gel.


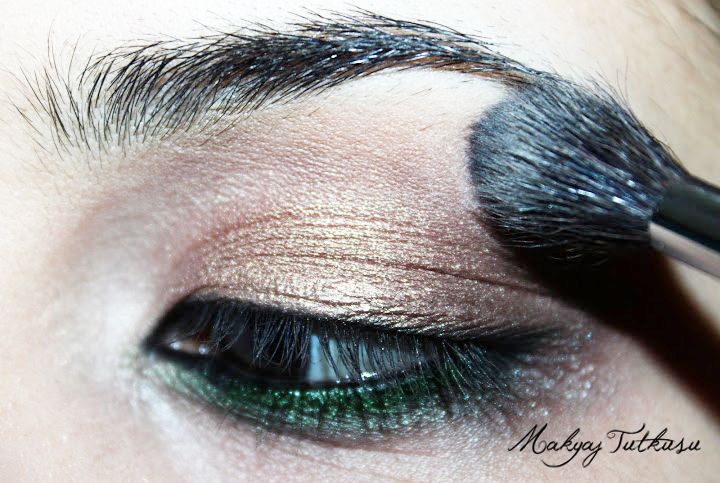
Step 10: Yanaginiza far düstüyse, o zaman yelpaze seklinde bir fircayla silin.
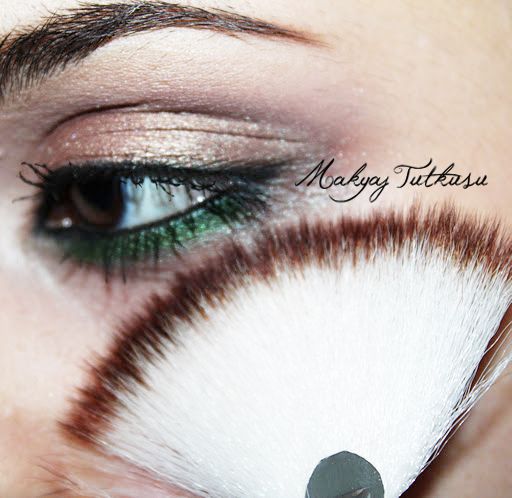
If you have any fallouts on your cheeks, then brush it away with a fan brush.


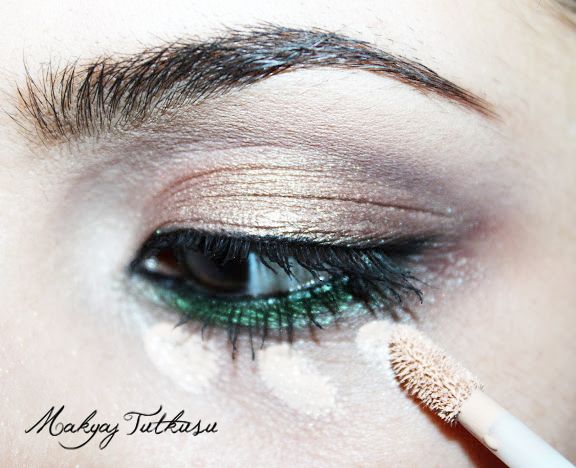
Step 11: Kapaticinizi sürün.
Apply concealer.


Ve bu kadar! Cok basit aslinda ve herhangi bir farla da yapilabilir bu göz altindaki 'pop of color'. Bu arada, umarim kaslarimin daginik görünmesi sizi rahatsiz etmemistir, bu resimleri cektigim günlerde kaslarimi uzatmaya calisiyordum.

And that's it! It's actually really simple and you can basically use any color on your lower lashline as a 'pop'. By the way, I hope my 'all over the place'-looking brows didn't bother you. I was trying to grow them out and reshape them when I took these photos.


Umarim begenmissinizdir! Bir sonraki yazimda görüsmek üzere.

I hope you liked this tutorial. I'll see you in my next post.

- iheartsu
----------