Bu seriye Makyaj Dersi demek hic dogru degil aslinda. Ben ders verecek pozisyonda degilim ki. Ama eski blogumda da böyle yaziyordum, simdi de böyle devam ettim nedense. Belki ismine "Adim Adim Makyaj // Step By Step Make-Up" koysam daha dogru olur. Sizce? Fikirlerinizi alayim. :-)
Gelelim bu yaziya. Birkac kisi mail ile iheartsu Blogger-Profilimde kullandigim profil resmindeki makyajin yapimini soruyordu, ben de bilgisayarimda aradim ve eskiden onun icin cektigim makyaj dersini buldum. Tabii eski blogun logosunu yeni blogunu logosuyla degistirdim ilk önce. Neyse, sonucum bu :-)
Calling this series 'Tutorial' isn't quite right actually. I'm in no position to give tutorials about make-up, but since I called this 'tutorial' on my old blog, I continued writing it like that here on my new blog, too. Maybe I will call it 'Step by Step Make-Up'. What do you think? Anyways, let's move on to the 'tutorial'. A few people have asked me how I did my make-up in my iheartsu Blogger-Profile's profile picture, so I searched for the tutorial pictures on my laptop and found them! Of course the logo of my old blog had to be replaced with my new blog's logo, so I did that and here we have it! I hope you enjoy this :-)
Buna 'Everyday Bronz' (= Günlük Bronz) ismini verdim, cünkü her gün icin uygun, basit bir makyaj, ama sonuc gercekten cok hos. Benim de cogunlukla yaptigim makyajlardan. Buyrun adim adim anlatima. :-)
I named this 'Everyday Bronze', because I think it's really simple and easy, yet very beautiful and perfect for everyday. I do this kind of look very often as well. Let's see how I did this step-by-step!
---
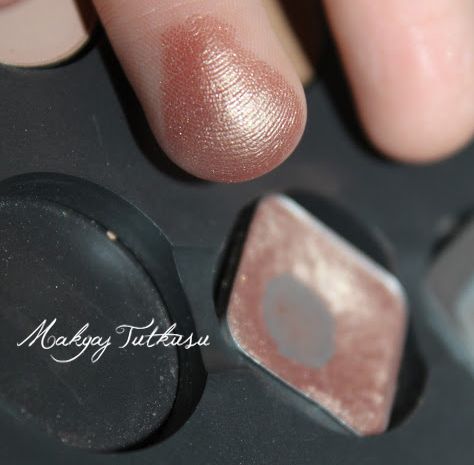
Step 1: Gözünüze baz sürdükten sonra altin/bronz bir fari bütün göz kapaginiza uygulayin. (Kaslarimi doldurdum bile.) Benim kullandigim renk MAC'in Devoted Poppy isimli paletindendi (ismini dogru mu söyledim, bilmiyorum).
After prepping your eyes with and eyeshadow base, apply a golden/bronze color to your entire eyelid. I used a color from a MAC Palette called Devoted Poppy or something like that.
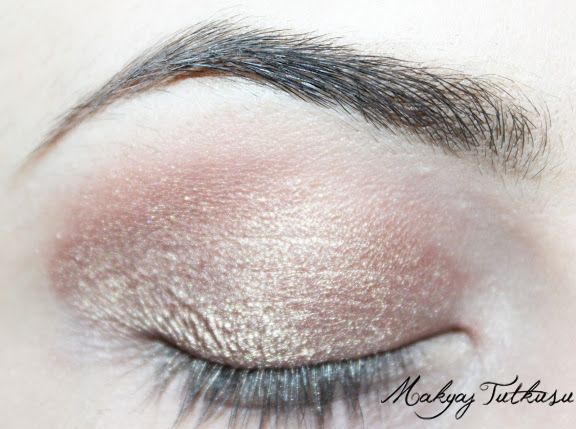
Step 2: Simdi yumusak ve temiz bir fircayla keskin cizgilerini yumusatin ve yedirin.
Now take a fluffy clean brush and blend out the harsh lines.
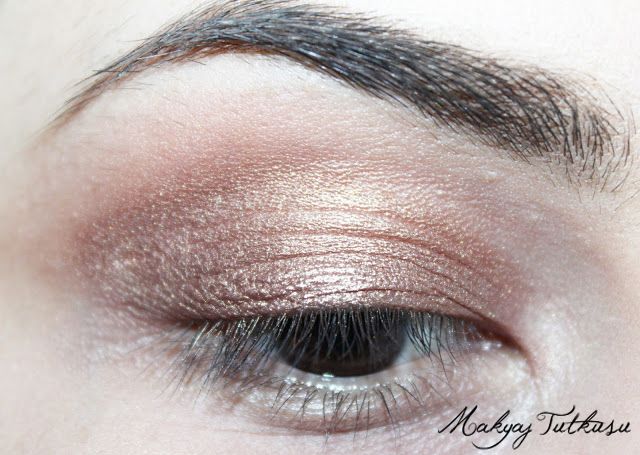
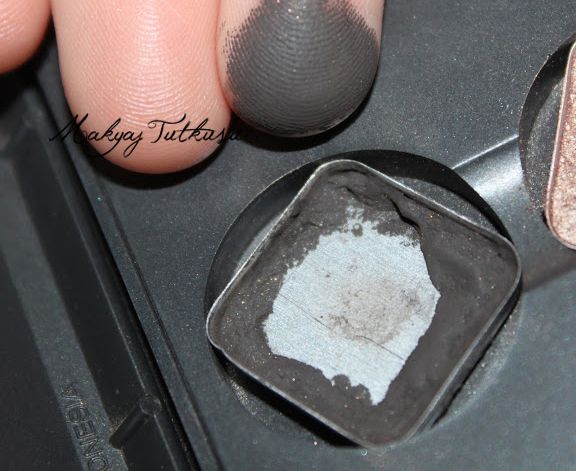
Step 3: Simdi hafif gri ve siyah ortasi bir mat renk sectim. Bu da ayni MAC paletindendi, ama farin ismini bilmiyorum. Bu hafif uygulandiginda ve bronz farla karistirildiginda biraz zeytin yesili bir renk aliyor ve bu cok hosuma gidiyor. Asagida ne demek istedigimi görebilirsiniz. Bunu kirisik bölgenize uygulayin.
Now take a grey-ish black matte color (this is also from the MAC palette, but I don't remember the name) and apply this into your crease area. When it's mixed with the bronze color, this eyeshadow turns into a beautiful olive color on the lids which I love.
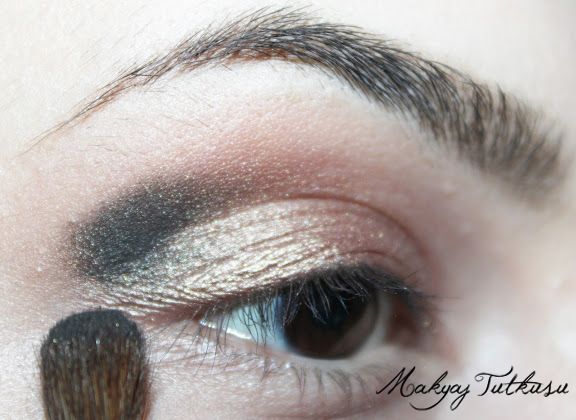
Ve karistirin tabii ki. Ben biraz daha enine dogru cektim, cünkü bu uygulamanin göz seklime cok yakistigini düsünüyorum.
And of course blend away. I blended it outwards, because I think it compliments my eyeshape more.
And of course blend away. I blended it outwards, because I think it compliments my eyeshape more.
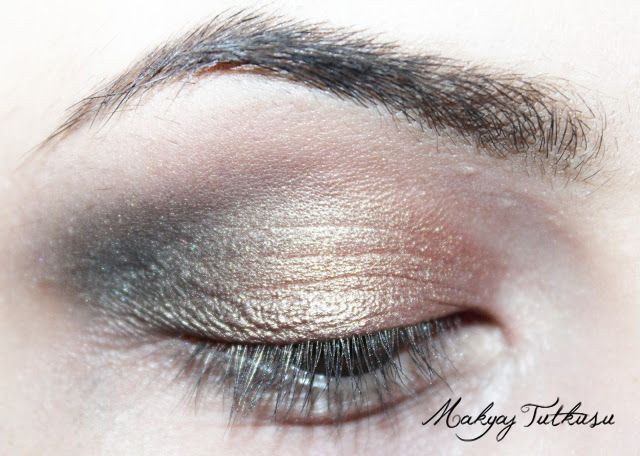
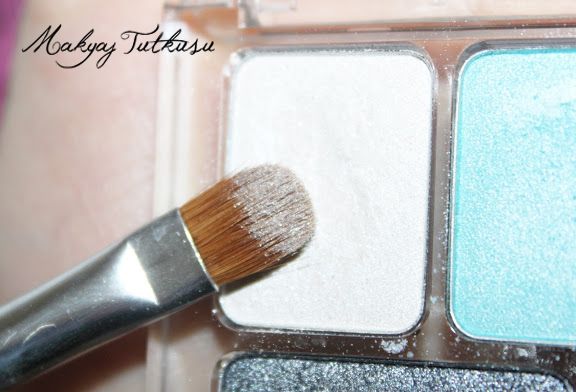
Step 4: Parlak beyaz bir far ile kasimin altini ve göz pinarimi aydinlattim.
With a pearly white shadow I highlighted my browbone and the inner corners of my eyes.
With a pearly white shadow I highlighted my browbone and the inner corners of my eyes.
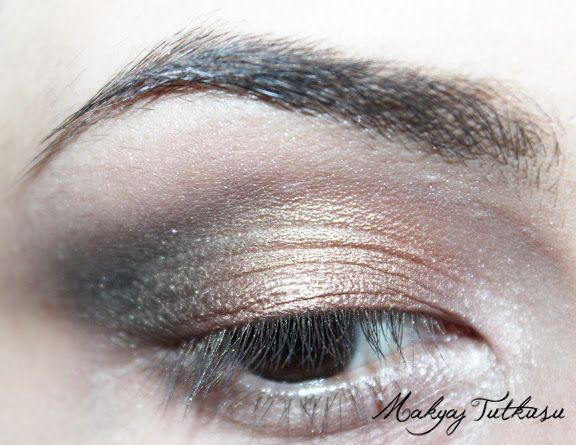
Step 5: Simdi gri fari göz altima (3de 1ine) uyguladim ve bronz fari göz altimin ortasina (bos kalan yere) uygulayip birbiriyle karistirdim.
Now I took the grey eyeshadow and applied it on my lower lashline (outer third) and took the bronze color and applied it on the middle part of my lower lashline.
Now I took the grey eyeshadow and applied it on my lower lashline (outer third) and took the bronze color and applied it on the middle part of my lower lashline.

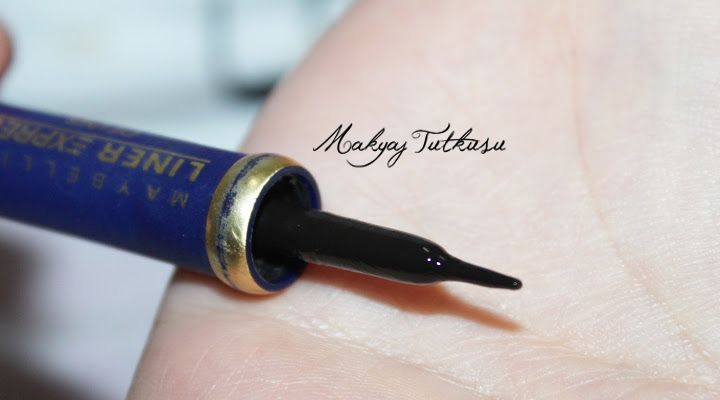
Step 6: Likit eyeliner ile gözlerime bir eyeliner cektim ve hafif bir kuyruk cizdim. (Maybelline Liner Express)
Now with a liquid liner I lined my eyes and winged it out slightly.
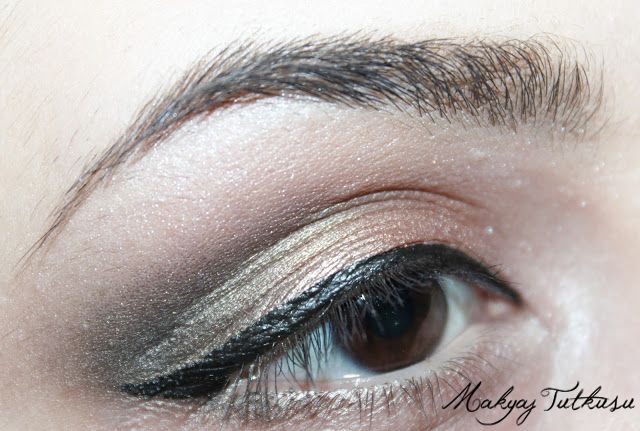
Bir ara bu eyelinersiz yasayamam derdim, ama simdi bu resimlere baktikca pek de iyi olmadigini düsünüyorum. Eyelinerin kuyrugu pek sivri ve temiz degil ve bitisi parlak. Yok, ben Catrice Liner'imde kalayim.
I used to think that I can't live without this eyeliner, but now that I'm looking at these pictures, I don't think it was that good. The wing isn't precise and clean and the finish isn't matte. No thanks, I'll stick to my Catrice Liner.
Step 7: Simdi siyah bir göz kalemiyle gözlerimin icine bir cizgi cekiyorum (sadece ortasina kadar) ve ardindan ince bir fircayla asagi dogru (farlarin oldugu yere kadar) yediriyorum. Bana göre yedirmeyince biraz keskin duruyor, ve ben keskin göz kalemini sevmem, hep asagiya dogru yediririm.
Now I applied a black khol liner on my waterline (up to the middle of my eye) and then I took a thin brush and blended the khol liner down into the shadows on my lower lashline. I think that if I don't blend it out, the line looks too harsh and I'm not a fan of that look, so I always blend it down.
Now I applied a black khol liner on my waterline (up to the middle of my eye) and then I took a thin brush and blended the khol liner down into the shadows on my lower lashline. I think that if I don't blend it out, the line looks too harsh and I'm not a fan of that look, so I always blend it down.

Step 8: Rimel zamani! Üst ve alt kirpiklerimde kullandim. Daha 'dramatic' bakislar isteyen sahte kirpik de takabilir, ama günlük makyaj oldugunu düsünürsek cogumuzun tercihi degil.
Mascara time! Top and bottom lashes please. If you want you can add false lashes, but since it's an everyday look, most of us don't prefer them.
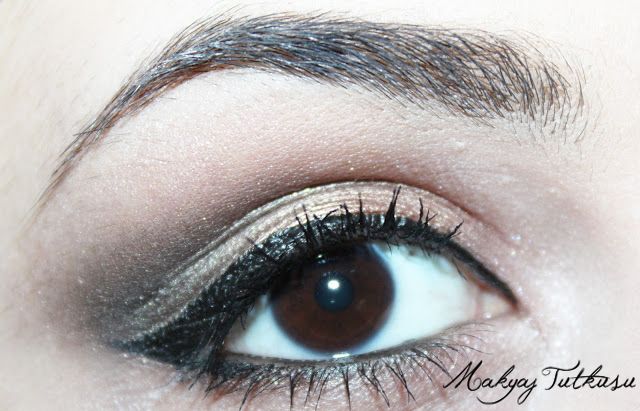
Gözlerle isimiz bitti, sonuc böyle...
We're finished with the eyes and here's what the make-up looks like...
We're finished with the eyes and here's what the make-up looks like...

Step 9: Yüzüme kontur ve sicaklik getirmesi icin Benefit'in Hoola bronzerini yanak kemiklerimin altinda ve sakaklarimda kullandim.
To contour and give my face some warmth, I applied Benefit's Hoola bronzer under my cheekbones and on my temples.

Step 10: Yanaklara pembelik ve ferahlik getirmesi icin de MAC'in Melba alligini kullandim.
For rosy and flushed cheeks I used MAC's blush in Melba.

Step 11: Son olarak da önceden lip balm ile nemlendirdigim dudaklarima nude/pembe karisimi bir ruj sürdüm (MAC Freckletone)
To finish off, I used MAC's Freckletone, which is a pink-ish nude, on my 'lipbalmed' lips.
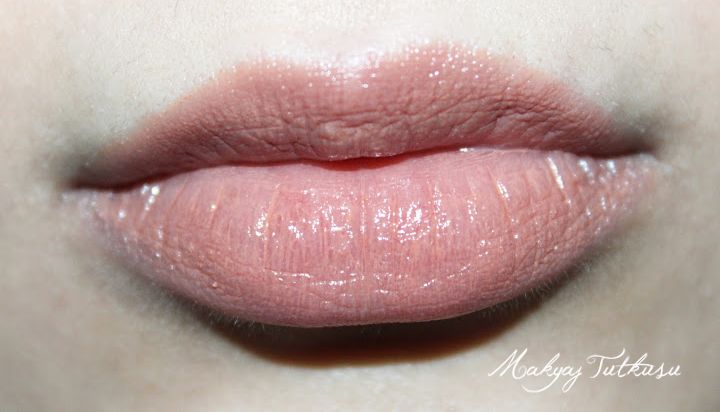
Ve Blogger profil resmimdeki makyaji böyle yaptim! Cok basit. Ne kullandik ki? 3 far, eyeliner, rimel, göz kalemi, bronzer, allik, ruj. Tamam, cok kullanmisiz. Ama olsun be, bosuna mi aliyoruz onca makyaji, kullanacagiz tabii!
And this is how I did my make-up on my Blogger profile picture. It's really simple and easy, right? :-)
Son zamanlarda bu makyajin aynisini yapiyorum hep, ama bir farkla: göz altima hicbir sey kullanmiyorum. Ne rimel, ne göz kalemi (nude kalem haric), ne de far. adece göz pinarlarima aydinlatici sürüyorum, o kadar. Göz altimi bos biraktigim zamanlar gözlerimin daha büyük göründügünü düsünüyorum. Diger türlüsü zaten kücük olan gözlerimi daha da kücük gösteriyor da. Umarim begenmissinizdir, hepinizi öpüyorum!
I noticed that I've been doing this look a lot lately, except for one thing: I don't use anything on my lower lashline: no mascara, no eyeliner (nude liner is an exception), no eyeshadows... Because when I apply dark products on my lower lashes/lashline it makes my already small eyes even smaller. Anyways, I hope you enjoyed this!
- iheartsu
Bloglovin': http://www.bloglovin.com/makyajtutkusu
Twitter: https://twitter.com/MakyajTutkusu
Pinterest: http://pinterest.com/makyajtutkusu/
Instagram: iheartsu


bayılırım bronz makyajlara :) nefis olmuş tatlımm :) <3
ReplyDeleteSag ol canim benim :*
Deletemakyaj anlatimlariniz cok guzel oluyor bu da cok guzel size de cok yakismis ellerinize saglik
ReplyDeleteTesekkür ederim, cok sevindim böyle düsünmene! :-) <3
DeleteMUH-TE-ŞEM :)
ReplyDeleteTesekkür ederim <3
Deletecokk guzel olmus makyajimn denicem kesinlikle
ReplyDeleteTesekkür ederim canim! Insallah kendinde de begenirsin! :-)
Deleteadım adım makyaj anlatımlarını çok seviyorum :) makyaj çok hoş olmuş.
ReplyDeleteTesekkür ederim, begenmene cok sevindim! Sen de dene <3
Deletemükemmel bayıldım :) tam benim zevkimde ellerine sağlık.
ReplyDeleteTesekkür ederim canim, begenmene cok sevindim!
Deleteçok çok hoş olmuş zaten sizim makyajlarınıza bayılıyorum ben:)
ReplyDeleteBen de senin yorumlarina bayiliyorum canim!! :-)
DeleteYine süpersin öpücük öpücük^_^
ReplyDeleteCok tesekkür ederim canim, en de süpersin! :*
Deleteçok güzel anlatmışsın, makyaj da ne güzel durmuş öyle :)
ReplyDeleteCok tesekkür ederim, böyle düsünmene cok sevindim! <3 Sende de cok güzel duracaktir :-)
Deleterenk geçişleri harika! vallahi söylenecek çok bir şey yok, yine çok güzel :) <3<3
ReplyDeleteSen yaparsan daha da güzel olur canim benim <3 Tesekkür ederim!
DeleteIIImmmhhh bayılıyorum bronz makyaj ve farlara <3 Ellerine sağlık canım yine süper.
ReplyDeleteSag ol canim, bu da senin stilindi, degil mi? :-) <3
DeleteEmegine ellerine saglik ne kdr duzenli ve ozenli bir anlatimla yazmissin yazini hayran kaldim. Tebrik ediyorum seni. Cektigin foto.larin kalitesi de cok iyi. Makyajin sectigin renk tonu ayrica cok hos, yakismis sana.
ReplyDeleteCok tesekkür ederim! Bu yorumu okuyunca daha bir mutlu oldum, cünkü bayagi zor bunlari cekmek :-) Begenmene gercekten sevindim, tesekkürler! :-)
DeleteHarika bir göz makyajı olmuş çok beğendim! Eyelinerı muntazam sürüyorsun bunun bir püf noktası var mı, ben bir türlü eşit süremiyorum :)
ReplyDeleteTesekkür ederim! Püf noktsi yok aslinda, ama ben genelde hep gözümün ortasindan baslyip kuyrugun kadr cekerim, sonra da fircanin üzerinde ne kaldiysa gözümün ic tarafiyla birlestirip tek bir cizgi yaparim. Youtube'da harik adim adim anlatan gurular var bu yöntemi, bence bir bak onlara :-)
DeleteAslında bir kaç video izledim sanırım bende yetenek yok :)) Dediğini dikkate alıcam teşekkür ederim:)
Delete